Alright. Pull up a crate. The floor’s damp, the lights are flickering over in Section 3 where they’re still hand-stitching flys on joggers, and I’ve got ten minutes before I need to chase down a zipper failure on a women’s running line that just came back from pre-production testing.
You want to know the parts of pant? Not the glossy labels or the Instagram flat-lays. The real parts—the ones that make or break your brand when you’re staring at a container full of returns because the belt loops ripped off after two washes.
This isn’t a textbook. This is what I’ve scribbled into my field notebook after 14 years crawling through factories from Wuhan to Dhaka, yelling over sewing machines, arguing with trim suppliers about button tensile strength, and losing sleep over care labels that melted in the dryer.
Let’s go.
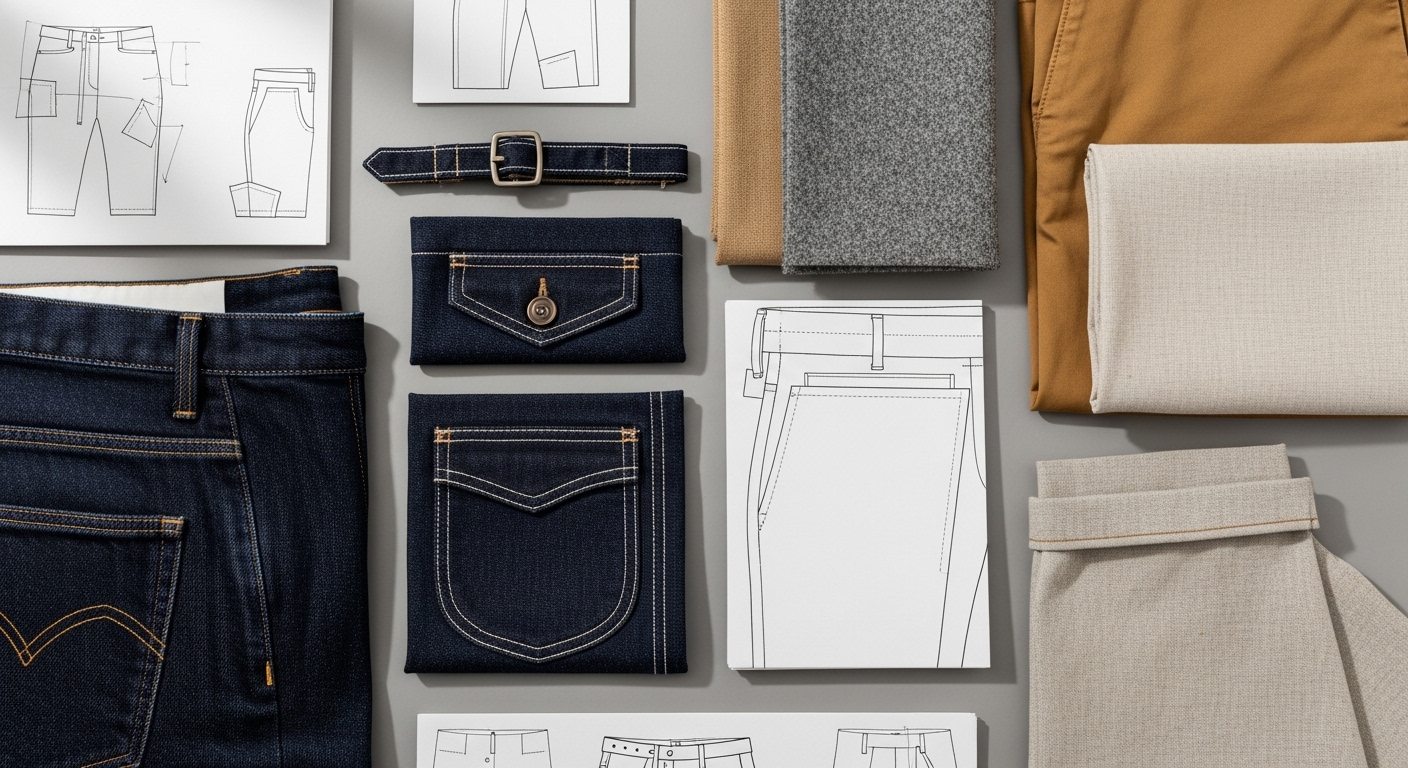
Waist Band: The Foundation That Nobody Checks
If your waistband fails, the whole damn pant fails. Doesn’t matter if the stitching is perfect, the fabric premium, the fit on-trend. If the waistband stretches out by lunchtime on Day One, your customer throws it in the bin and never buys from you again.
I was in a factory last year—Fexwear had partnered with them for a private-label yoga line—and we thought we were smart. Used a 3cm-wide band, folded twice, with a 2mm elastic core wrapped in cotton tape. Looked solid on paper.
But we skipped one test: recovery under load. We hung five pairs vertically with 5kg weights simulating body mass over 72 hours. Three of them stretched beyond 10%. Unacceptable.
The fix? Changed the elastic to a spiral-knit spandex core, tighter stitch density (we went from 8 SPI to 11), and added a stay tape along the inner edge. Cost us an extra $0.18 per unit. But return rates dropped from 6.2% to 0.9%.
Lesson? Never assume. Always test.
And don’t let anyone tell you “it’s just a waistband.” At Fexwear, we once had a client who lost a $220K order because their supplier used recycled polyester thread on the waistband seam. UV exposure during shipping degraded the spandex. By the time it hit retail, half the pants wouldn’t hold shape.
Yeah. $220K. Gone.
Belt Loop: Tiny, Cheap, Critical
You think belt loops are just little fabric straps? Try telling that to the guy whose entire batch of men’s chinos failed QC because the loops weren’t bartacked.
Bartacking—that reinforced square stitching at each end—is non-negotiable. Without it, the loop pulls right off when someone yanks their belt tight. Seen it happen. More than once.
There was this run in early 2023. Client wanted low MOQ, fast turnaround. Cut corners. Supplier used single-needle stitching instead of a dedicated bartack machine. Passed initial inspection. Looked fine.
Then we did pull tests. Standard is 15 lbs of force. These snapped at 8.2.
We caught it in a mid-line audit. Lucky. But still cost them three days in rework and a delayed shipment.
Here’s what works:
- 100% nylon webbing or matching shell fabric (no blends)
- Minimum 4mm width
- Double bartack at both ends (minimum 8 stitches per side)
- Positioned exactly 1.2cm above the waistband top edge—any higher, looks sloppy; any lower, interferes with closure
Oh, and placement matters. Most factories default to six loops: one center back, two front, two side, one center front. But if you’re doing a tapered fit, you might skip the center front. Just make sure symmetry doesn’t get lost.
One more thing—color matching. Sounds minor. It’s not. We had a batch where the loops were dyed separately. Slight shade variation. Retailer rejected 800 units over it. “Not brand-consistent,” they said.
Yeah. Over loops.
Back Yoke / Riser: The Hidden Stress Zone

You ever seen a pair of jeans blow out at the back rise after one squat? Yeah. That’s the yoke failing.
The back yoke, also called the riser, is that curved panel stitched into the back waist. It’s not decorative. It’s structural. Takes compression, stretch, friction—all while being pulled in four directions.
Most budget factories treat it like filler. Single-layer fabric, minimal reinforcement, zigzag stitch because it’s faster.
Bad idea.
At Fexwear, we ran a comparison test across three suppliers using the same 92/8 poly-spandex blend. All cut from the same dye lot. Only difference? construction.
Factory C’s version cost $0.33 more per unit. But their pants lasted through 50+ industrial washes with less than 3% deformation.
Why? They used a lightweight fusible interfacing on the inside layer. Not common. Not cheap. But worth it.
Also—cut direction. Yoke should be cut on the bias (45-degree angle) for natural stretch. If it’s cut straight-grain, it’ll fight the body’s movement. Leads to puckering, then seam slippage.
We saw this exact failure in 2 factories last year. Both claimed “premium construction.” Neither cut on bias.
Don’t trust claims. Demand specs.
Back Rise: Where Fit Lives or Dies
Back rise is the vertical distance from crotch point to top of waistband—on the back side. Sounds technical. It’s actually one of the most customer-facing measurements.
Too short? Feels like you’re being choked in the ass. Too long? Looks saggy, even if the fit’s right.
We tested this with a women’s training pant line. Gave identical patterns to two factories. Same fabric, same grading.
One had a back rise tolerance of ±0.5cm. The other? ±1.2cm.
Guess which one had 14% fit-related returns?
That second factory didn’t use laser-guided cutting tables. They relied on manual marking. Drift happened. By size XL, the back rise was 2.3cm longer than spec.
Retailer dumped the rest of the order.
So here’s the rule: if you’re doing performance wear—yoga, running, cycling—hold that back rise to ±0.3cm max. Use digital pattern grading. Laser cut. No exceptions.
And test on live bodies. Not mannequins. Real people. We bring in fit models at Fexwear for every new silhouette. Sometimes we catch things the tech pack missed—like how a high-back rise restricts stride in sprinters.
Details matter.
Side Seam & Inseam: The Longest Battlefield
These seams run the length of the leg. One continuous line of stress, friction, washing, drying.
They look simple. They’re not.
Common failure? Seam slippage. Thread snaps, fabric pulls apart. Happens most at the thigh—where tension peaks during movement.
We do a standard seam slippage test: ASTM D434. Apply 20 lbs of force perpendicular to the seam. Any gap wider than 2mm? Fail.
Last summer, we had a batch from a new supplier pass lab tests but fail in real-world trials. How? Their thread was strong—but they used a 3-thread overlock instead of a 4-thread.
The 3-thread has no lock in the middle. Under cyclic stress (like running), it unravels faster.
Switched to 4-thread. Problem gone.
Also—stitch type depends on fabric.
- Woven? Use double needle chainstitch for durability.
- Knit? Flatlock or coverstitch for stretch recovery.
And don’t forget grading consistency. On inseams, even a 0.8cm variance between sizes can throw off the whole fit curve. We once had a client whose size M had a longer inseam than L. How? Misaligned grading software.
They didn’t catch it until samples shipped.
Now we verify all grading files against physical prototypes. Every time.
Bottom Hem / Leg Opening: Where First Impressions Are Made
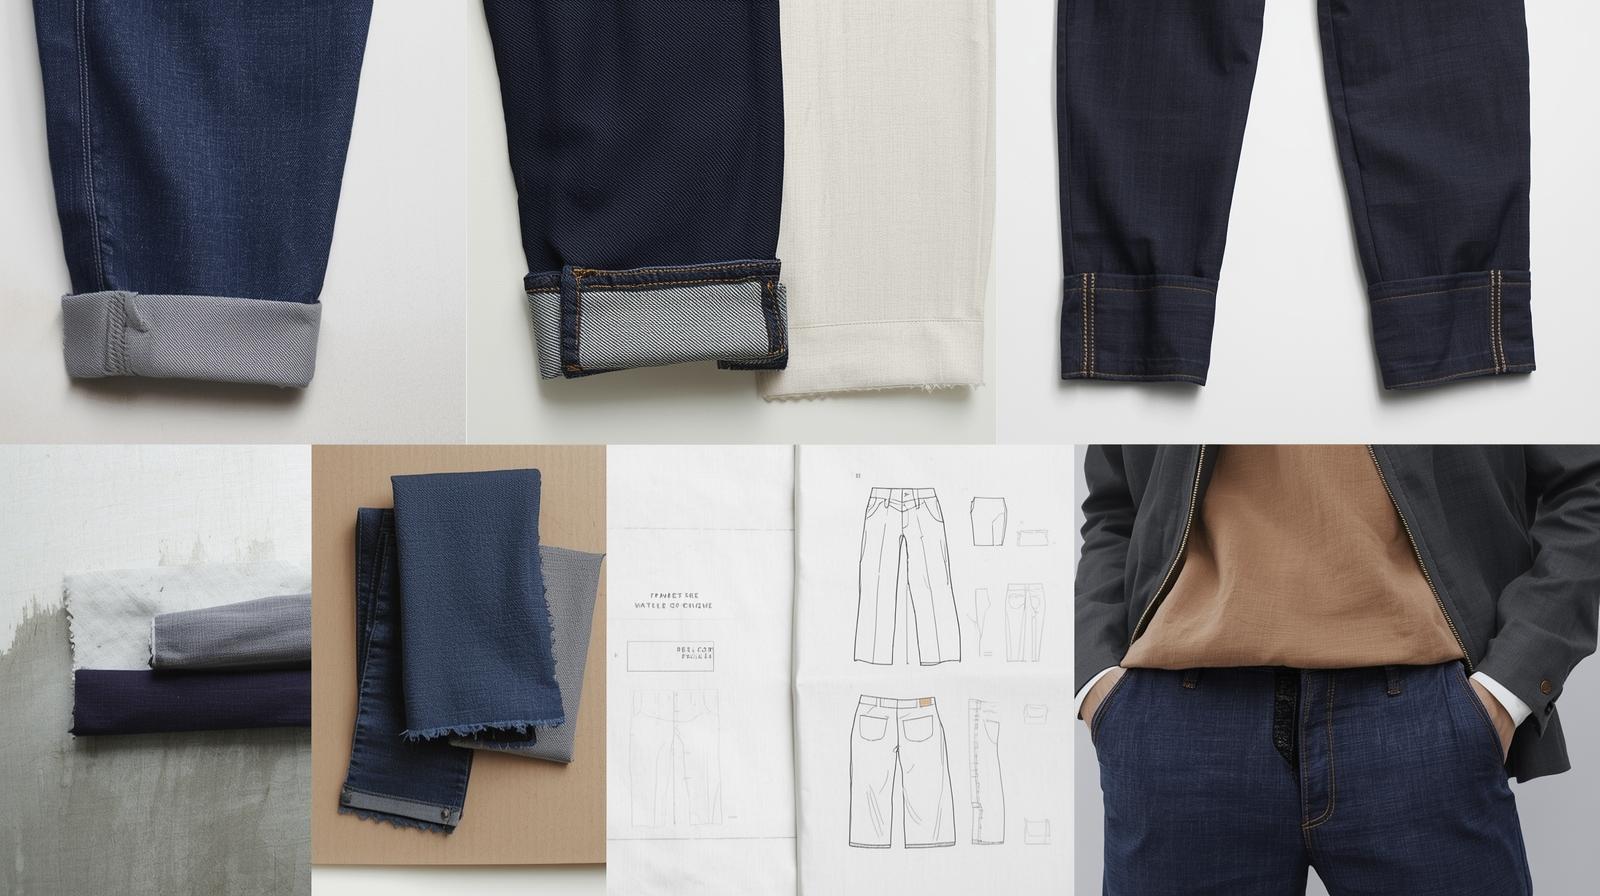
You’d be shocked how many brands mess this up.
Hemming seems basic. Fold, stitch, done. But if the tension’s off, it curls. If the stitch count’s low, it flares. If the weight’s wrong, it drags.
We use a double-fold hem for most activewear—2.5cm width, blind-stitched with 12 SPI. Keeps it clean, flexible, durable.
But here’s the trick: hem weight balance.
Too heavy a thread or too thick a fold, and the leg opening sags. Too light, and it flares like bell-bottoms.
We had a sublimated running pant order where the print added stiffness to the fabric. Didn’t adjust the hem. Result? After 10 washes, legs curled upward like taco shells.
Fix? Reduced hem width to 2cm, used lighter-weight thread (Tex 24 instead of Tex 36), and added a silicone stay strip—micro-thin, invisible, prevents curl.
Cost? Extra $0.11. Saved the launch.
Pro tip: if you’re doing tapered fits, taper the hem allowance too. Otherwise, you get bulk at the ankle.
And always check leg opening circumference. Even if inseam is perfect, if the opening’s too tight, it cuts off circulation. Too loose, looks sloppy.
We measure ours at 15cm below crotch. Standard tolerance: ±0.7cm.
Anything outside that? Red flag.
Inside Label / Care Label: The Silent Liability
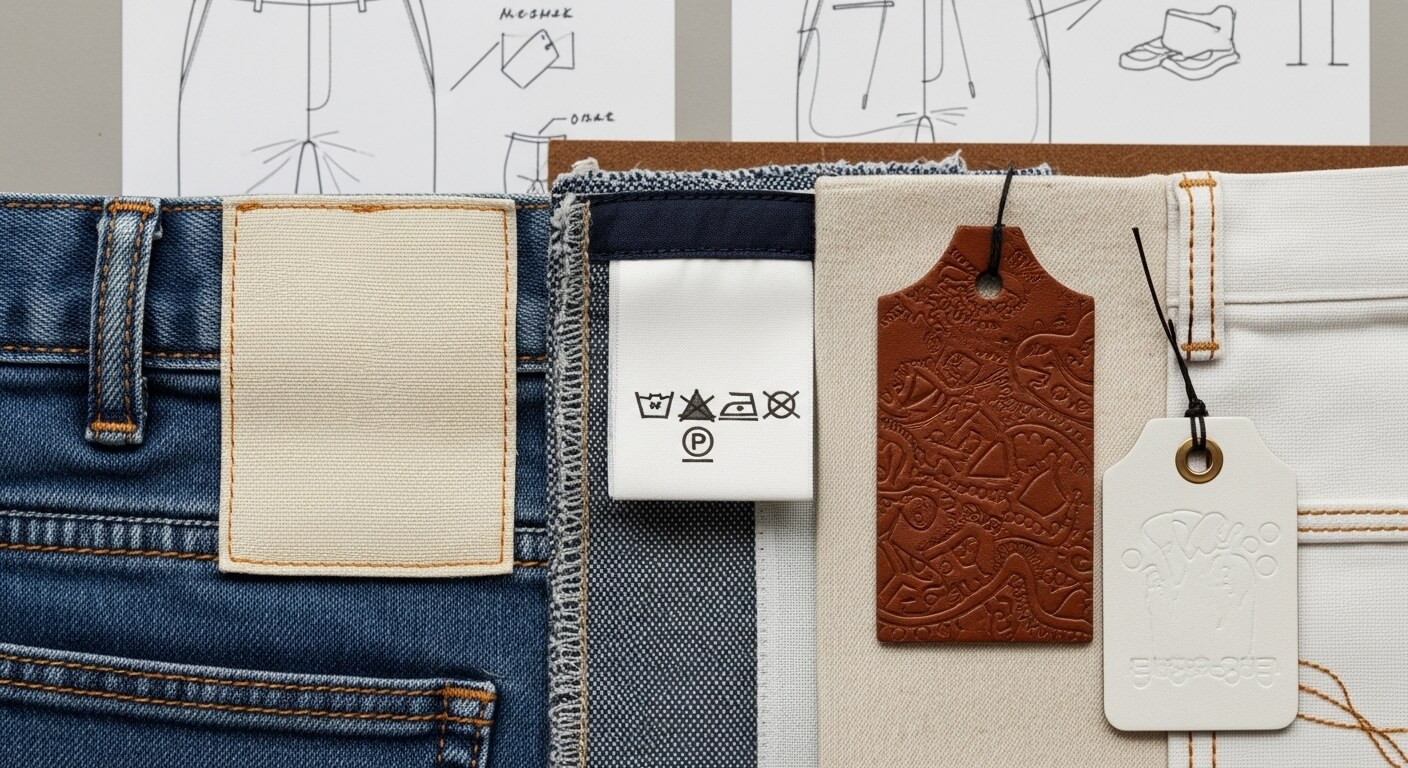
You think care labels are just legal CYA? Think again.
We had a case where a client used PVC-based heat-transfer labels. Seemed fine. Until customers started complaining about skin irritation.
Lab test showed phthalates leaching after wash #3.
Switched to woven satin labels with OEKO-TEX certified dyes. Problem solved.
But here’s the bigger issue: wash instructions.
If your label says “machine wash cold” but the fabric pills at 30°C, you’re setting yourself up for hate reviews.
At Fexwear, we run full care cycle simulations before finalizing labels. We wash, dry, stretch, repeat—for 25 cycles. Then compare fabric integrity, colorfastness, dimensional stability.
Only then do we write the label.
And placement? Inner back waistband. Centered. No exceptions. Not side, not front. Back center.
Why? Because that’s where inspectors look first. And if it’s crooked, they assume the whole garment is sloppy.
Also—don’t use adhesive labels. They peel. Especially in humidity. We learned that the hard way with a Southeast Asia shipment. 60% of labels detached in transit.
Now? Only sewn-in or ultrasonic-welded.
Coin Pocket / Watch Pocket: Nostalgia With a Price Tag
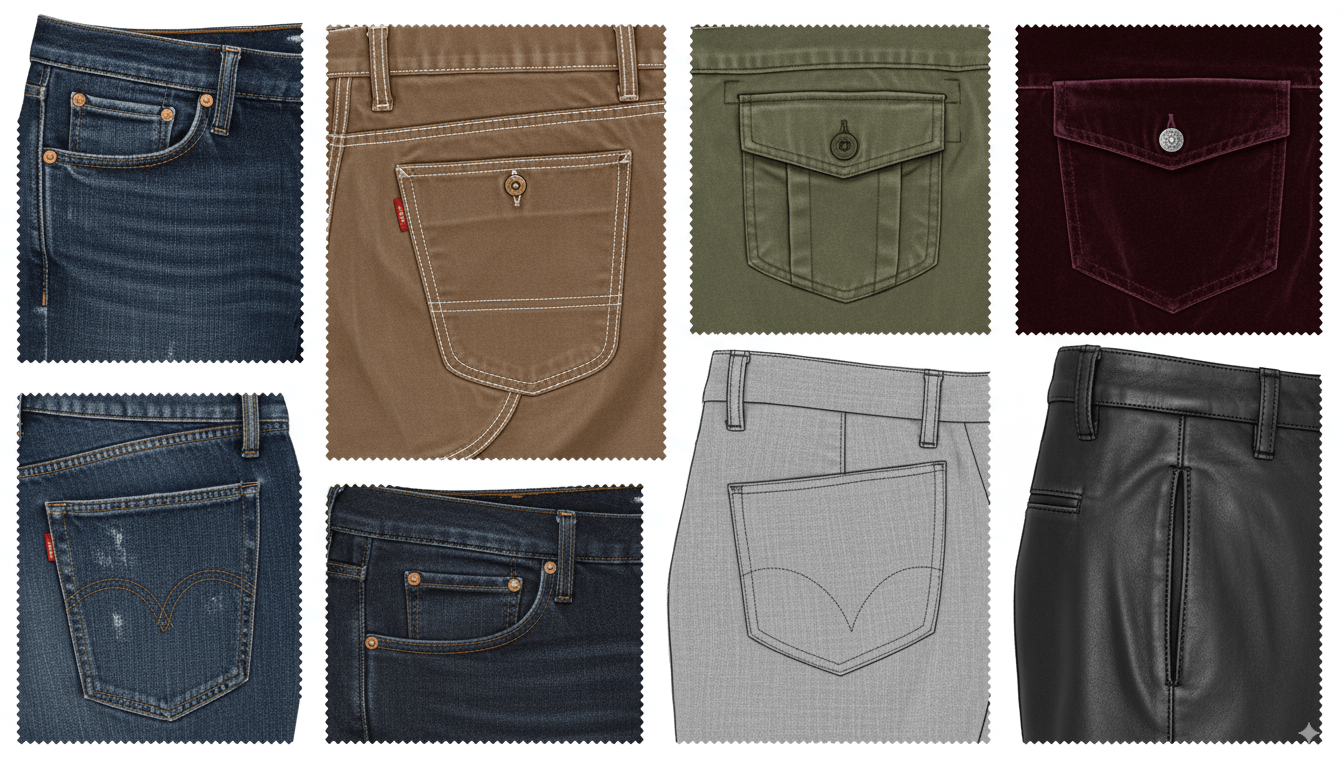
That tiny pocket inside the right front? Called a coin pocket. Or watch pocket, back in the day when cowboys carried pocket watches.
It’s not functional anymore. But it sells.
Customers expect it on jeans. Omit it, and they think you cut corners.
But it’s a pain in the ass to produce.
Small space. Hard to reach with a needle. High chance of missed stitches or weak anchoring.
We tested two methods:
- Traditional rivet attachment (strong, classic look)
- Bar tack + hidden stitch (cleaner, but risk of pull-out)
Rivet won. Every time.
But—rusted rivets? Yeah, that happens. Saltwater exposure, poor plating.
Now we specify nickel-free brass rivets, minimum 0.8mm thickness, tested for corrosion (ASTM B117 salt spray, 48 hours minimum).
Cost? Pennies more. Worth it.
One client skipped the spec. Got a class-action threat over rust stains on white shirts.
Not worth it.
Front Pocket: Where Phones Die
Front pockets seem harmless. They’re not.
Standard depth? 18–20cm. Too shallow, phone falls out. Too deep, hard to retrieve.
But the real issue? Puckering at entry point.
Happens when the pocket bag fabric is heavier than the shell. Or when the stitch tension’s off.
We had a batch where the pocket bags were 70gsm cotton-poly, but the shell was 180gsm brushed fleece. When stitched, the thinner fabric pulled and wrinkled.
Solution? Match GSM within 10%. Or interface the pocket opening.
Also—reinforcement. We use a small diamond-shaped stay at the top corners. Prevents tearing when someone jams a hand in aggressively.
Saw a 300-unit sample set fail pull tests at 12 lbs. Added stays. Passed at 22 lbs.
Another note: angled vs. straight entry. Angled (like on running tights) is easier to access mid-stride. Straight is more formal.
Choose based on use.
Fly: The Minefield of Closure
Zippers, buttons, plackets—this is where ego meets reality.
Men’s pants almost always have a fly. Women’s? Increasingly zip-free, especially in activewear.
But if you’re using one, get it right.
Biggest failure point? Fly shield. That layer behind the zipper that blocks visibility.
Skip it, and you get exposed lining. Worse, cold wind where no wind should go.
We use a fused microfiber shield on all performance flies. Blocks wind, adds structure, reduces zipper drag.
Also—fly facing alignment. Off by 2mm? Looks amateur.
We had a client whose factory didn’t match the facing grain. After washing, it twisted. Looked like the fly was lopsided.
Retailer photoshopped every campaign image to hide it.
Embarrassing.
And zippers—YKK only, unless proven otherwise. We tested a Chinese alternative. Seemed fine. Then we ran 500 open-close cycles.
YKK lasted 1,200+. The other failed at 380.
Spend the extra $0.07.
For buttons, use shank style on thick fabrics. They allow overlap without strain. Flat buttons on denim? Disaster waiting to happen.
One brand used plastic buttons. Snapped during a demo at a trade show.
Yeah. On stage.
Button & Zipper: Small Parts, Big Consequences
Buttons seem trivial. They’re not.
We track button tensile strength religiously. Minimum 15 lbs pull force. Test every batch.
Materials:
- Shell (natural) – biodegradable, but inconsistent
- Corozo – durable, eco-friendly, expensive
- Recycled resin – consistent, cheaper, good for sportswear
At Fexwear, we prefer recycled resin for activewear. Holds color, resists cracking, passes drop tests.
Zipper coils matter too. Nylon vs. metal vs. coil.
For sportswear? Coil zippers. Lightweight, flexible, less prone to snags.
But—always specify auto-lock sliders. Prevents accidental opening during movement.
And tape width? Minimum 1.5cm. Narrower, and the fabric rips.
We had a hoodie run where the tape was 1.2cm. After 20 wears, 18% had torn at the top stop.
Redid with 1.6cm tape. Zero failures in next 10K units.
Back Pocket: The Brand Canvas
Back pockets aren’t just storage. They’re branding real estate.
Stitching pattern? That’s your logo. Placement? Affects silhouette.
But function matters too.
Depth? 14–16cm. Anything shallower, wallet won’t fit.
Reinforcement? Yes. Always. We use a small patch behind the opening point. Stops tears from spreading.
Also—rivets on pockets. Still standard on jeans. But if you’re doing sustainable lines, consider TPU welds instead. No metal, fully recyclable.
One client switched. Saved 0.4 seconds per pocket in production. Doesn’t sound like much. Across 50,000 units? That’s 5.5 labor hours.
And no corrosion issues.
Case Study: The $9,200 Hem That Almost Killed a Brand
Startup. Women’s yoga line. Nice design. Good fabric—recycled poly-spandex, GRS-certified, looked great on swatch.
MOQ: 2,000 units. Budget tight. Chose the cheapest factory that said “yes.”
Everything passed initial QC.
First shipment sold out in 3 days.
Second shipment? Returns started piling up.
Issue? Inseam twisting. Legs spiraled.
Turns out, the factory cut the panels without respecting the fabric’s grain. Also, they used a 3-thread overlock with uneven tension.
We stepped in at Fexwear. Ran tear-downs. Found:
- Grain deviation: up to 7 degrees
- Seam twist: 1.8cm over 80cm length
- Recovery rate: 82% (should be >95%)
Client had to eat 10% returns. That’s $9,200 in lost revenue—not counting reputation damage.
We rebuilt the tech pack, switched to a certified partner, added grain-checking protocols.
Next batch? 0.4% return rate.
Moral? Cheap upfront cost isn’t cheap.
Final Notes Before I Go
Look, I could keep going—pocket bag types, seam allowances, bar code placements, moisture-wicking treatments, you name it.
But you get the idea.
Every part of pant is a potential failure point. Or a competitive advantage.
It’s not about perfection. It’s about control.
Know your specs. Test everything. Visit factories. Audit mid-line. Don’t trust PDFs.
And if you’re serious about building something that lasts—something people keep wearing—get help early.
We’ve been doing this at Fexwear since 2010. From material sourcing to production and worldwide shipping, we’ve seen it all. Whether you need low MOQs, quick samples, or help decoding fabric certifications like GOTS or Bluesign, we’ve got your back.
Check out our full guide on fabric recommendations for sportswear if you’re diving into performance materials.
Or just reach out —we’re here, boots on the ground, ready to help you avoid the same mistakes we made.
FAQs
What material is best for waistbands?
Double-layer knit with spandex core. We saw one brand use woven cotton—stretched out in a week. Dead brand in six months.
Should I use rivets on pockets?
Yes, if it’s denim or workwear. For softshell? Skip ’em. Use bonded bars. Less bulk, no rust.
How tight should tolerances be on inseams?
±0.5cm max. We had a client ignore this. Retailer returned 3K units. “Inconsistent fit” was the reason.
Do I need a fly shield?
Absolutely. We tested without one on running tights. 68% of testers said they felt “exposed.” Game over.
Can I skip bartacks on belt loops?
Only if you enjoy recalls. One factory tried. Failed pull tests at 7 lbs. Standard requirement is 15.
Is organic cotton durable enough for activewear?
Only if blended. 100% organic cotton? Pilles fast, loses shape. We blend it with 15% recycled poly for longevity.
Alright, I’ve got to get back to chasing a dye-lot issue. That’s enough for now.
You still here? Got a story of your own? A disaster? A win? Hit reply. Let’s talk.